Wednesday 29 April 2020

Dark Copse

Continuing the "Dark Conspiracy" campaign, here's another 'battle' (as opposed to skirmish)  this week, and if you missed last week's ECW bust up, you can check it out on The Emerald Musketeers blog here :-   Uffeton Fight  )

When Nicodemus left Shanaera and her group in Kislev (click on the "Dark Conspiracy" tab in the side bar if you want a refresher), he wasted no time making his way directly to Tancred Castle in Couronne. Here, he followed a hunch and sought out the works of  Bretonnian authoress Catherine d'Mann which he knew was kept in the castle library..
Within moments of studying the tome he sought, his heart and head raced as he fought a terrible sinking feeling in his soul. Dashing from the library, he called for the swiftest rider from the troop of Knights Errant garrisoned at the castle and despatched him post haste to the dwarf hold at Karak Kadrin with a simple message...
"March in strength immediately up the Peak Pass to the ruins of Dark Copse Tower and deny it to any who attempt to occupy it!"

So it was that Okaghord Branehelm led three companies down from the foothills of the Worlds Edge Mountains onto the plains of Drakenmoor, where the blasted remains of Maeldoraz's tower stood alongside "The Dark Copse", while a Liche advanced towards him with an army of undead intent taking the tower by force.
Okaghord placed his housecarls in the centre, with his veteran (first generation GW mono pose plastic!) shieldwall on their left by the copse, and the Kadrin militia covering the open ground on his right.
As the dwarven line prepared to defend the ruins, the skeletal cavalry maneuvered for the charge,
and the rest of the undead host advanced.
Suddenly battle was joined across the entire line,
the slower moving ghouls on the right wing had no time to deploy into line before crashing into the dwarf veterans.
In the centre, the housecarls repulsed the skeleton horde which had attempted to fight their way over the remains of the tower walls.
The mounted charge had failed to break the militia, but neither had the dwarves managed to force their mounted opponents to recoil and a standing melee had developed.  
The second unit of skeleton foot warriors charged the housecarls while the first unit re-ordered themselves,
and the ghouls were now also embroiled in a standing melee with the dwarf veterans, neither side achieving an all important 'push back'.
The skeletons were once again driven away from the ruins, and now the ghouls recoiled from the solid shieldwall. Things seemed to be going the dwarves way, however, the mounted warriors on the left flank still refused to give ground.
Within moments, the undead surged forward again! The militia STILL standing toe to toe with the tenacious cavalry.
Skeletal warriors were once again scrambling over the ruins,
and the ghouls began a renewed attempt to break to dwarf left flank.
The tide of battle now looked to have swung the other way,
even though the militia were clearly winning the 'war of attrition' against the mounted warriors, and the veterans had once again pushed back the ghouls,
both units of skeletal foot were now inside the perimeter of the tower ruins!
At this point the remaining ghouls failed to rally and shambled off,
but it was Okaghord Branehelm's last gallant stand at Dark Copse Tower. As he fell with the remaining housecarls, the rest of the dwarf retinue fled the field when the liche stood atop the blood drenched ruins and let out a spine chilling cry of victory (caused a "Fear" test which the already shaken dwarf units failed).
Over in the depths of the Dark Copse, a helpless Nicodemus could only look on in anguish.
He didn't recognise him from his human form, but there was no doubt that the liche was Maeldoraz!
The realisation that the necromancer's followers had succeeded in reanimating their master also meant that Beska and his party of adventurers had not only failed, but most likely perished.
As he slunk away and began his journey to Altdorf, he wondered why Maeldoraz had returned to the tower. Did he intend to rebuild his former stronghold? Or, as he now suspected, did he want the site for some dark secret that it might still hold buried in it's depths?


As events continue to unfold in the campaign I needed to resolve this battle before I could move on, so I set up the table and used it as an excuse to try out the latest version of "One Page Rules" Fantasy Battles. I knew from previous releases that it would give me a quick and enjoyable game with the bare minimum of effort 'admin-wise'. The A.I supplement worked extremely well and I'll definitely keep these rules to hand for future use.
I sincerely hope that everyone is doing OK, and that you are keeping your spirits up through these challenging times.
As always, I'd love to hear from you if you'd care to leave a comment, and especially if you have any observations or queries to post.


Wednesday 15 April 2020

The Battle of Corona - Part 2

With the army of Albion on the retreat, Emperor Mordred returned to Mudrid with the bulk of his troops, leaving Marshal Sault to continue pressing the Orc's withdrawal. Lieutenant General Sir John Morr reached Corona with his troops in poor condition after their forced march across the Cantankerousse Mountains, and immediately embarked the dismounted cavalry and their mounts plus the majority of the artillery, retaining 8 Albion and 4 Catalucian guns ashore along with limbers, caissons and teams.

The sight of the Britorc navy ships and the thought of Morr getting away unscathed stimulated Sault to begin his attack, despite his Ferach troops being in arguably worse condition than the Orcs who had picked the Cantankerousse Mountains clean ahead of his own foraging parties.

Morr’s main position lay along the Monte Maca ridge, from the village of Elvira to the Burger Estuary, while Marshal Sault deployed on the Palava and Pennysquido ridges. The Ferach heavy guns took post on the Heights of Pennysquido, ready to bombard the village of Elvira.
Bentorc’s Brigade held the ground around Elvira, with Waaagh’s Guards Brigade and Orccingham’s Brigade on its left. Flashorc’s brigade held the high ground above the Corona Road, with Major Black Bob Crowfoot’s Brigade on the heights above Lingalonga.
The Ferach army was drawn up with L'Escargot’s Dragoon Division on the extreme left, Gui de Carcharoth’s Infantry Division supported by the heavy guns facing Elvira, de Payen’s Infantry Division in the centre and Alabec’s Infantry Division forming on the right with St Bane's light cavalry.

Sault was forced to wait impatiently for stragglers to rejoin their units, but the heavy guns finally signaled the start of the battle at around 2pm.
The Coldscream Guards occupied Elvira while the 62nd Foot remained pinned behind the town by the enemy artillery fire, and at this time Morr has sent a re-call message to General Sir Edward Pungent, who he'd dispatched to Corona for embarkation with the reserve artillery.
The one-sided artillery contest continued, while the "pas de charge" reverberated along the valley. Pungent's battalion and the gun battery can be seen on the road passing the village of Ooza, while the Ferach advance has been slowed to avoid being disordered as they cross the river. (a house rule)
Artillery fire from the ridge reeked havoc with the lead battalion of de Payen’s division. The line infantry, who were already heavily fatigued and demoralised after "leading the chase" over the Cantankerousse, became pinned on the river bank and subsequently routed.
The rest of the Ferach left flank continued their advance, and assaulted the Coldscream Guards in Elvira, which had just been reinforced by the Black Joccs.
Elvira became the scene of some intense fighting,
and contact was made along the entire line,
while the rearguard division of Sault's forces arrives and advances to reinforce the Ferach left.
The light cavalry on the right flank advanced to 'threaten' Crowfoot's brigade, eager to be within striking distance if the Albion line collapses.
The Dragoons on the left flank also prepared to exploit the position if Elvira fell, hoping to "roll up" the Albion line. The Orcs up on the ridge stoically responded to the cavalry threat by forming square,
while the rifle armed elements within Crowfoots brigade demonstrated their superior accurate range!
As the afternoon wore on, General Morr understood that he had the better of Sault, IF he could hold Elvira. It was imperative that the Guards battalions held in what had become a battle of attrition, and he moved into the town to bolster the beleaguered troops morale.
As he joined Black Joccs, Morr was struck by a roundshot fired by the Ferach guns on the Heights of Pennysquiddo and thrown from his horse, his left arm nearly severed and his chest and lungs severely damaged.
Darkness was falling and both sides in the area of Elvira, now exhausted, withdrew from the village.
The Britorcs carried out an orderly withdrawal towards Corona, and the Ferach, in no shape to pursue, were content to take the Pennysquiddo Heights.

Lieutenant General Sir John Morr was carried back to Corona, but died of his wounds before the army evacuated from Catalucia.
Marshal Sault rested his forces around Elvira prior to their long march back over the Cantankerousse Mountains, though he did deploy his artillery to the west of the Corona road and had them fire on the Britorc Navy ships as they left the harbour - no doubt to endorse his report to the Emperor that he had despatched the Orcs of Albion "with a bloody nose"!

This was a fun little project, I knocked up the battlefield to represent the original "Battle of Corunna" from an offcut of plywood and some left over Jarvis grass sheet, glued over card shapes to represent the "Monte Moro" and "Penasquedo / Palavea Heights".
The rules I was taking for a test drive were "2 by 2 Napoleonic's" by Rod Humble, which are available for free download, and I can heartily recommend if you fancy playing 2mm Napoleonics on a 2ft square table!


ANNOUNCEMENT
As mentioned previously, I'm highly delighted and honoured to be posting over on "The Game Cupboard" and "The Emerald Musketeers" blogs. I will be starting a couple of 'new' projects over there, but I'll also be migrating some of the content from here.
All future posts for my Napoleonique, England Upturned and Sengoku Jidai campaigns will appear on THIS blog :- The Emerald Musketeers
All the stuff currently posted here will remain (ie I won't be cutting and pasting stuff across the blogs), but if you just happen to be 'following' any of these campaigns, you'll find the updates appearing on TEM from now on.
My Dark Conspiracy and Zombie Apocalypse will continue here (and who knows, maybe some new stuff will appear too!), and I apologies profusely if this causes any confusion or consternation for anyone.

Many thanks for dropping by, and of course your comments, queries, observations or points of order are most welcome - especially during this time of isolation.

Stay safe, Stay home and Stay sane!

Thursday 9 April 2020

The Battle of Corona - Part 1

The Emperor Mordred has swept across the peninsular at the head of his Ferach army, soundly defeating the Dark Elves of Catalucia and their allies, the Goblins of Al-Garvey and the Orcs of Albion.
Lieutenant General Sir Jon Morr now leads the Orcs are in a desperate race to reach the port of Corona ahead of  Marshal General Sault, and escape back to Albion aboard ships of the Britorc navy.
Black Bob Crowfoot commands the Light Brigade and is tasked to cover the movements of Morr's army during their retreat. This results them engaging the Ferach in small rearguard clashes, and what follows is a report of one such clash which takes place just north of the town of Elvira.

Corporal 'Clubber' Fang is in charge of a section of Orcs made up of members of the light company, 67th South Mordor Foot and three Chosen Orcs of the 105th Rifles. The section has been tasked with a scouting mission as far as the road which runs across the base of 'The Heights of Penasquido', and it is here that they encounter Ferach skirmishers (of the 2eme Regt de Ligne and 4er Voltigeur), probing towards Elvira.
I'm using "Song of Drums and Shakos", and the terrain was generated by the rules. Initial deployment was done quite simply with a D3 for left, centre, right for each of the four 'elements'.
Clubber Fang leads fellow Orcs of the 67th South Mordor, while the Chosen Orcs clear the buildings on his right flank.
A sporadic firefight develops, as Capitaine Alex Crement deployed behind the roadside fence line while the voltigeur attempt to outflank the Orcs - unaware of the Rifles in the buildings now behind them!
The position looked like becoming a stand-off since Clubber seemed frozen to the spot, continually failing activation rolls and unable to get around the cottage and co-ordinate the action. However - the Rifles were now taking up fire positions.
An aimed shot from an upper story window.....
..... and the first of the Voltigeur falls!
The Voltigeurs were unable to react fast enough to correct their error and only two of their number managed to retreat to the safety of cover, and from there, retreat to their own lines as Capitaine Alex Crement signals the retreat.
Both sections returned to their parent units with the same information - "Contact with the enemy has been made, so the main forces must be nearby. Prepare for a major engagement!"

An "overview" rather than a blow-by-blow account of a fun game, where the action unfolded at a pace which outran my note taking!

The "Song Of" series of games are very much based around their activation system, where players choose to roll between one and three dice against the figure's 'Quality' - each dice passing the 'Q' value allows one action BUT if two or more failures are rolled, the turn ends and play passes to the opposition.
A simple solo mechanic is to roll three different coloured D6 and a D3. The three colours always represent "choices" (in my case, green = 1st choice, yellow = 2nd and red = third).
Here's the result of one of Clubber's rolls, and the D3 indicates the "choice" was two dice, so the green and yellow count but the red is discarded. (The result was two failures...... again!)

Many apologies to the original artist for doctoring his map of this part of Valon, the port was named Korunna, but under the current circumstances I just couldn't help myself!
Does the Army of Albion escape? Will King Gorge, son of Gorge, son of Gorge be happy?  Please tune in for part two, which I'll post as soon as I've discovered the answers to those very questions!

Stay at home, Save lives and Solo wargame, and if you feel inclined to leave me a comment  or question I'll be only too happy to hear from you during this period of lonely isolation.


Wednesday 1 April 2020

The Alchemical Factory

This tale picks up "The Dark Conspiracy" campaign from where it left off here.... The Quest Finale

After leaving Beska and his companions at the entrance to Maeldoraz's burial place, the court mage Nicodemus had travelled northwards to Kislev, "the land of the ice queen", on the next part of his mission. Unfortunately, when he arrived at the provincial town of Gerslev in the Southern Oblast, he was totally unaware of what fate had befallen the party of adventurers.

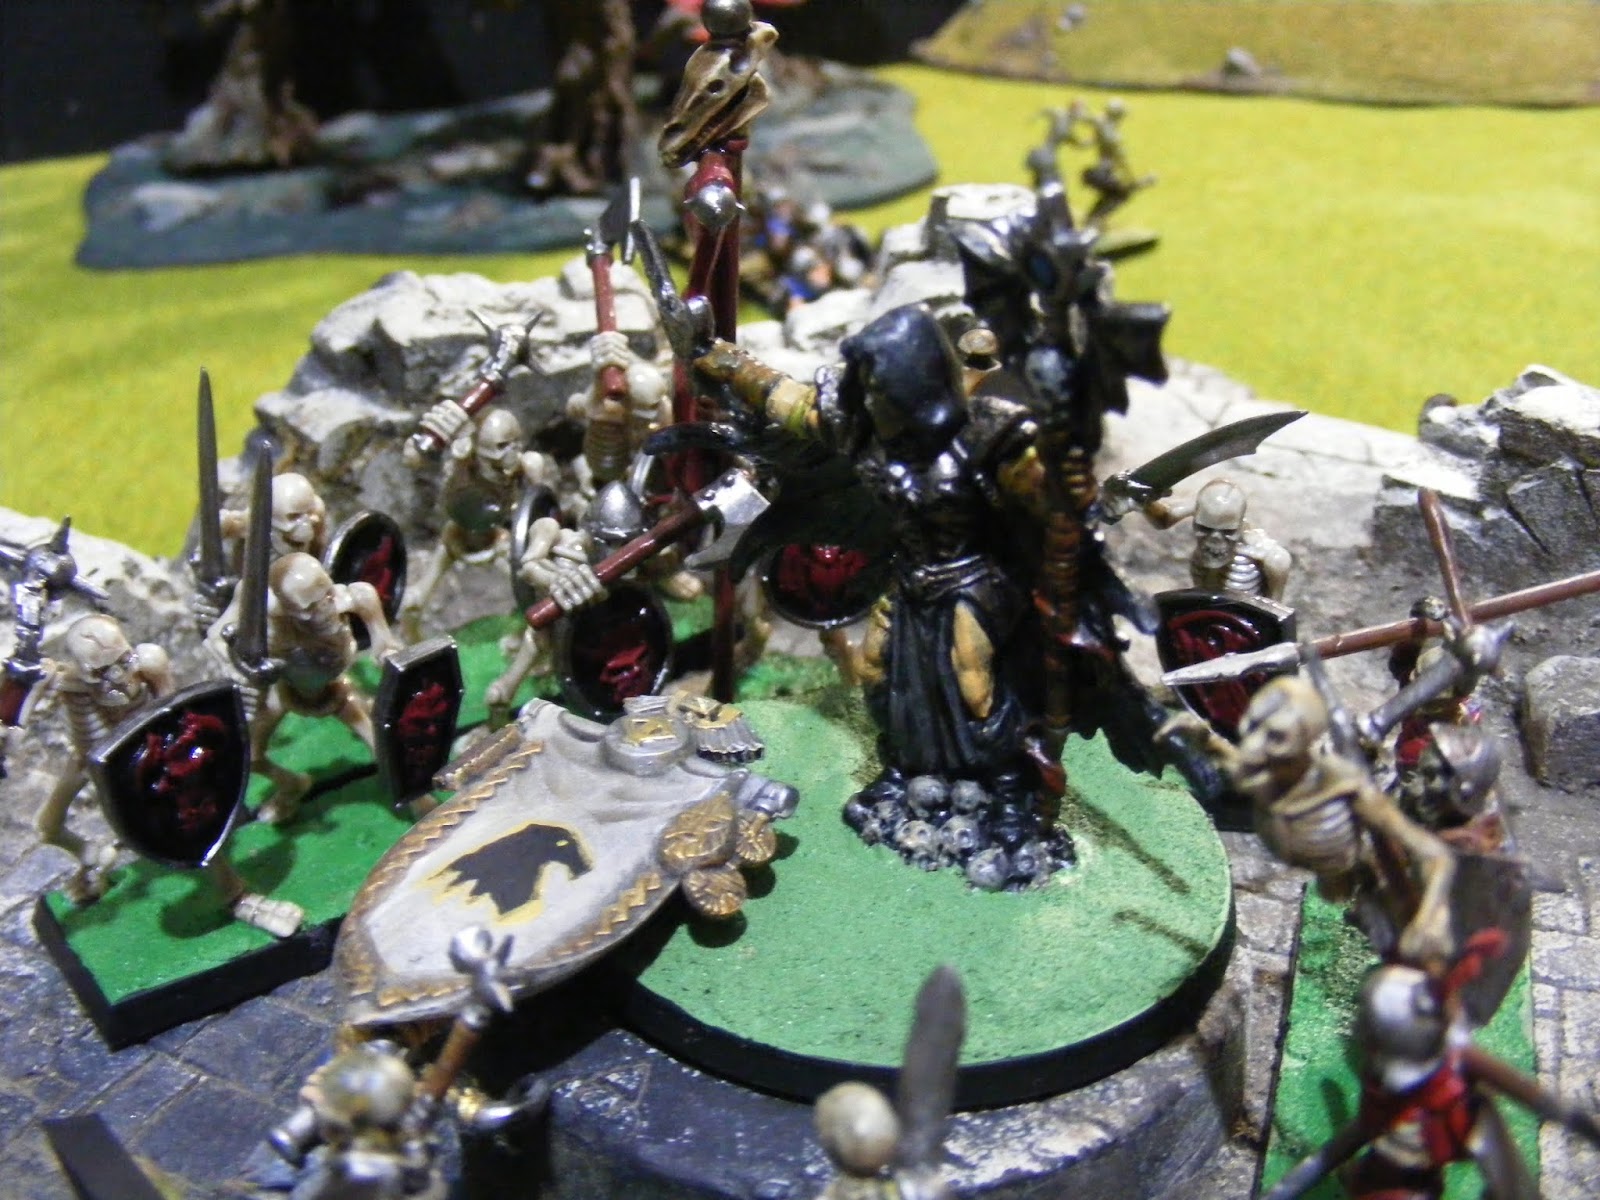
Nicodemus spoke to Shanaera Elaralei, head of The Order Of The Temple Of Our Lady Myrmidia, explaining that he had been made aware that cultist's serving the cause of Maeldoraz had gathered in number somewhere near Praag. He needed her to take a body of Templars and track down these servants of evil, and put a stop to whatever activities they were up to. (Which he was convinced were part of a larger, sinister scheme)
He himself had further pressing business to attend to in Couronne, but she should send news of her mission to Altdorf, where he would be returning at the earliest opportunity.


Shanaera bade her old friend farewell and immediately summoned her sergeant, Lena Duchannes, to assemble the other sisters and prepare to set off for the Eastern Oblast with blade maidens Gielda and Kyrene scouting ahead.
After several days travel, the main body of eight Templars reunited with the scouts, who had learned that the cultists had last been sighted at an old alchemical works on the outskirts of Volksgard, less than a day's march away.
The battle sisters arrived that same evening and approached their target cautiously.
After forcing an entry, the warband began searching through the works without finding anything but broken furniture and scattered papers. Then just as they entered a room filled with old potion bottles, an explosion rocked the whole factory, destroying walls and taking down what remained of the roof. (left to right) Cambric, Shanaera, Carbonel and Berta found themselves dropped through the collapsing floor of the room into a cellar complex.
Hundreds of potion bottles had shattered and spilled their contents across the floor, and a cloud of dust restricted their vision (16 inches). Separated from the rest of the warband, and with no way of climbing back up, the four servants of Myrmidia must find a way out of the cellars and reunite with their companions. Unfortunately, some of the randomly mixed potions caused by the mysterious explosion had also spawned something - something that now needed to feed.
The initial board se-up with the "Alchemical Monstrosity" out of 'line of sight' close to the centre, and four treasure tokens. A rat hole in the middle of the opposite wall to the party, and two doors in the corners - only one of which will provide a way out. 
The sisters advance looking for a way out and hear something large scuttling in the dust laden gloom not far away.
Each turn starts with a D20 initiative roll. The party 'loses' initiative on a 1 - 7 and two things happen. A giant rat swarm emerges from the hole, and any 'monsters' act first. 
The party won initiative on turn one and moved forwards. The Monstrosity couldn't see the party so moved randomly towards one of the doors - which turned out to be the same one that the party were heading towards!
Aware that they are not alone they split into pairs, Shanaera and Berta heading towards the middle of the cellar,
 while Cambric and Carbonel picked their way along the right hand wall.
With the party still out of sight the Monstrosity dices again for which door it heads for, and now sets off for the opposite corner. 
Distracted by the glint of something valuable, both groups detour and pause briefly to pick up two items of treasure, 
 
while the loud scuttling can be heard moving away from them.
Suddenly a pack of rats as big as cats appeared from a hole in the wall, (The party had 'lost' the initiative roll.)
 but for now, the Monstrosity remained in the far corner. (It is still has no line of site to any of the party, and its random move was again for this door, so it remained in position)
Shanaera stepped forward and cast an Elemental Bolt at the rats, destroying them but weakening herself in the process.
She is a Thaumaturgist and the Elementalist spell suffers -2 on its casting roll, which she failed by 4. A wizard can choose to expend health points to 'boost' the casting roll before calculating damage. In this instance, Shanaera lost 4 points of health to make sure the spell worked, and she killed the rats.
At this point Cambric had reached the door and found that it opened onto a stairway, but whether it saw Shanaera and Berta advance, heard the dying shrieks of the rats, or Cambric's shout - the Monstrosity was advancing!
Giving up on any thoughts of taking further treasure, Shanaera and Berta ran for the open door, Carbonel and Cambric saw them and took it as their cue to exit the room ahead of them, securing the stairs leading back up to the ground floor. The monstrosity continued to give chase,
and at that moment more rats appeared from the hole in the wall (The party lost the initiative roll!) and the tentacled beast attacked Berta, causing horrific wounds! (7 points of damage, reducing her to just 3 health)
Berta was badly injured and unable to retreat from the melee. Shanaera turned, determined to save her companion, and not knowing what strengths or weaknesses this strange creature might possess, she cast a "Push" spell (a low target number spell so it had a high chance of success) on the foul beast.
The monster was pushed directly backwards out of the fight and the wizard and her swordmaiden fled, slamming the door closed behind them. The party won the initiative roll and took to their heels!

Pausing on the stairs to catch their breath, the party examined the treasure they'd picked up before setting off to try find the rest of the warband.
Rolls on the treasure table : 3 potion (cordial of clear sight, poison and elemental absorption*),
a bag containing 25 gold crowns and a potion bottle of construct oil.
Experience points from the encounter - 30xp for the wizard exiting the door, 5xp for killing a rat swarm, 50xp for exiting with two treasure tokens = 85xp.

I have to say, I REALLY liked this introductory run through of the Frostgrave system, and the fact that I can weave the existing Olde World campaign around it so easily is a bonus.
The rules are simple but not simplistic - never seeming to "get in the way" of enjoying the game, and you can't ask for more than that!

I apologise  for the blurry photo's that intersperse the lucky 'almost in focus' ones that I managed to get - this is what happens when you're so wrapped up in the action that you lose concentration regarding the warzone correspondent phase!

If you've spotted anything I've done wrong as a newcomer to these rules, please don't shout at me, but feel free to leave a (quiet) corrective suggestion along with any general comments or questions you might have.
* Oh, and can anyone tell me why the B turns into a P when absorb becomes absorption??

Thanks for reading, stay safe and..........